Saturday, February 26, 2011

Got Spring?

We had about ten inches of snow yesterday, and I'm soooo ready for spring. I got my Friendship Jar and Friendship Jar Spring fillers stamp sets yesterday so I could have some spring inside at least.

This was my first time using a copic highlight around a stamp. Thanks to Nicole Heady (of Papertrey Ink) and this wonderful video. I used a light gray copic marker because it's what I had, but I'm happy with the way it turned out. I am usually not a purple person, but the new (PTI) Royal Velvet is so luscious. The tulips are from the Friendship Jar Spring Fillers stamp set. The jar is from the Friendship Jar stamp set and I cut a jar out of a plastic sheet that the stamps were on with the Friendship Jar die. The lid cut very well, but I had to do a little extra cutting with a pair of scissors for the jar. I think I need more shims, but I was in a hurry lol. I put a little glossy accents over the jar stamp and used that for glue. I used a craft knife to cut lines just outside the jars for the ribbon. I made the card for the first Club Ruby Designers challenge, there is a free membership option if you are interested :D.

Friday, February 25, 2011

February 2011 PTI Blog Hop

This month's challenge was to use scallops. I used the little scallop flower from the Paper Tray stamp set. The sentiment is also from the Paper Tray stamp set. The cardstock is all PTI. The circle is Blueberry Sky, the mat is Vintage Cream and the card is Hawaiian Shores. The ink is Ocean Tides (also PTI). The only things that aren't PTI are the ribbon and the purple rhinestones which didn't have labels, but they are lovely :D.

Wednesday, February 23, 2011

WOYWW 90 - Out for a Spin

Hello, my name is Ohhh Snap, and I'm a craftoholic. I haven't been doing much in my craftroom this week, but I've been doing a bit of spindle spinning. And for the record, I am a spinster. I am not a spinner, there is no stationary bicycle in my home, and no lycra in my wardrobe. I am the only spinster in my spinning guild btw, everyone else shudders at the word spinster. The three spindles on the left are Journey Wheel Spindles and they are a engineering dream. The two on the right I made with wooden toy wheels and dowels. They are very portable and decorated for fun.

My two current favorites. On the left a Journey Wheel Spindle made of holly wood with, I believe, alpaca. On the right another Journey Wheel Spindle made of moose horn with natural flax tow roving being spun. There's a method to winding hurdy gurdy, if the thread breaks it's more difficult to find if you've wound your thread on in neat concentric rows :D.

Some of my mini-skeins. On the top is a single ply silk (spun on a Lendrum Spinning Wheel), a 2 ply tencel/wool blend that is dreamy, and on the bottom is a single ply linen (spun from bleached flax tow roving).

My little bag of embroidery thread experiments. I like to ply threads against themselves, white, gray and black and sometimes other colors to see how they work when sewn.

If you are wondering what is the WOYWW, or if you are interested in having a lovely snoop at other people's workdesks, or even better joining in, head over to Ms. Dunnit's Stamping Ground :D

Wednesday, February 16, 2011

WOYWW - It's soooo my type :D

It's short and sweet this week. The workdesk looks pretty much like it did last week. So this week it's all about my new typewriter :D. Despite my friend's protestations, this lovely came home with me from the thrift store for $5.49! And it came with another typewriter ribbon, a keyboard card and an instruction manual. It just makes me all swoony. And the case wasn't even a little mildewy! As someone who as brought home many an abandoned typewriter, I've learned the portables in cases are usually in the best condition.

If you are new to WOYWW (What's On Your Workdesk? Wednesday) and are wondering what's it all about (Alfie lol), or if you want to have a gander at lots more lovely spaces, head over to the Stamping Ground.

But my happiness of the day while I was writing this post has been so counterbalanced by the news of the assault of reporter Lara Logan while she was covering the celebration in Egypt. I believe every act of misogyny is an attack on us all and diminishes every one's well being as human beings. I also believe that if we are silent, it will be taken as a sign of our complacency.  So I am breaking my policy of no "news" on my blog.

Friday, February 11, 2011

Purse-onal Bouquet

I started with a purse cut from Plantin Schoolbook. Then I cut a second one and cut the sides off of it and then attached it to the first solid colored one. The flowers come from Create-A-Critter (three different flowers with the center cut hidden with the Hide Contour features of the Gypsy).

A close up of one of the flowers. I used chocolate coins for the flower centers.

The lady bug tag is made with the Home Decor Solutions cartridge, a 2 inch circle, Papertrey Ink Rustic Twine and lots of Black Diamond Stickles.

The flowers were made with the ATG tape gun. I used green plastic straws for the stems, and just ran some ATG up the top of the straw and then attached it to the flower. The coins were also attached with ATG.

Wednesday, February 9, 2011

WOYWW - 88

Usually I'm in the "Gee is it Wednesday already" group, but this week I was getting ready to post WOYWW on Monday night lol. It's been busy on the ole crafting table this week including one stint to post 9 cards (and 9 separate posts) for the Papertrey Ink Design a Stamp Set with Nichole Heady Contest as part of the Fourth Anniversary Celebration which had me up until 3 AM by the time I photographed and posted everything.

So, as you can see, I was doing a lot of stacking and pushing which reminded me of a video from CHA at Scrap Time where Tim Holtz was creating in the same manner. He called it creative chaos I believe, so if it's good enough for Tim Holtz, well by golly it's good enough for me lol. They have 5 videos of a 50 minute session of Tim Holtz doing a demo at CHA. Oh my bug, the glassine paper, the "stand" which is so brilliant, the stamps well just everything!

I made a steampunk mini book which I am filling with little bits and Tim Holtz message stamps as the recipient really likes those. It's a tiny tiny book (3.5 x 5") and the sort you have to hold open to read (and put in the scanner to get images lol).  I used one of the stamps from the Stampers Anonymous 100th collection (with all the tickets) which says "art is a shadow of what a person is thinking". I dug into my handy dandy box of experiments and scraps which double as ready to use embellishments.


When I found the little frame cut out of kraft cardstock, I got me thinking about the trip Tim Holtz (I know, how many times can I squeeze Tim Holtz' name into a single post lol) wrote on his blog about to Disney and I came up with this little embellishment for the page using the skew button on my Gypsy to make the shadow (which is foiled to match the frame). I undercut the image so it would have a more jaggedy edge to it.

Lastly I have evidence of use of my treasured Waltzing Mouse stamps I got for Christmas from the sister who made me the gorgeous quilt. Faux knitting fun abounds :D. There will be lots more to come, but I needed to show the stamps have been in use lol.


If you would like to see more crafty creation sites fun, head over to Julia's Stamping Ground, better yet, snap a picture and join in the fun :D.

Monday, February 7, 2011

Steam Punk Mad Plaid Love

Today is my day to be the Guest Designer at TheBugBytes which is always exciting and nerve-wracking at the same time lol.

This started out with the last image from Love Struck 2010. I'm not the typical Valentine's Day Person, so I chose a black and plaid combination. A couple of tips about box making I've learned over the past couple of weeks: it's much easier to decorate a flat box, so decorate before assembling, and use the edge of a craft table to fold score lines rather than a ruler.

I decorated the heart with the Viva Decor Hematite Glitter Line. With the height set at 9.04" on the Gypsy, the box dimensions are 4" x 1" x 6.5". I used the Your Story (the Your Story Photo would also work for this) to make a mini book that will go in the box with a candy bar.

The mini book cover 3.5" (the front cover is 3.25" to show some of the pages) x 5" with a 0.5" spine that I scored in the middle so the spine had a little dimension. I used Black Magic Core'dinations cardstock and ran the front through my Cuttlebug Clockworks folder (which is a whopping 5" x 7" btw). It's the perfect size for those Tim Holtz message stamps I've been collecting lol.

Papertrey Ink Tag Download Challenge 9


This tag is by Maile Belles. I colored it with a Cadmium Red Copic marker and the card is made with Pure Poppy cardstock.

This has been a wonderful challenge. I wasn't sure I'd get all 9 tags used in projects. It's also been very serendipitous as I've been considering dipping my toe in digital stamping and now I've gone and jumped into a very small lake lol. You can get the .pdf file for the tags here as well as some information about the Papertrey Ink Design Team and projects they made. Wish me luck as the prize for the random draw is a Guest Designer Spot at PTI and working with Nichole Heady on a stamp set.

Papertrey Ink Tag Download Challenge 8

This tag is by Lisa Johnson. I painted it with stickles and the card is made with Pure Poppy cardstock.

Papertrey Ink Tag Download Challenge 7


This tag is by Alli Miles and is colored with ArtQuest Jewelz the shimmer is amazing and is only hinted at in the picture. The sentiment is from the Year of Flowers: Lily of the Valley stamp set. The card is made with White Shimmer Cardstock.

Papertrey Ink Tag Download Challenge 6

This tag is by Nichole Heady. The "Birthday" and the outside circle have all been colored with the Clear Spica Glitter pen and it is sooo glittery in real life, sadly it is beyond my camera skills, especially at this hour to capture the glitter. The mat is White Shimmer cardstock and the card is made with Aqua Mist.

Papertrey Ink Tag Download Challenge 5

The tag in this project is made by Dawn McVey. The sentiment and the star are from the Star Prints stamp set. The cardstock is Blueberry Sky.

Papertrey Ink Tag Download Challenge 4

This tag is made by Beth Silaika. It is edged with the Clear Spica Glitter pen. I used some white organza ribbon from my stash with an Aqua Mist mat on a card made with White Shimmer cardstock.

Papertrey Ink Tag Download Challenge 3

This tag is made by Melissa Bickford. I colored it with a little chalk. This was my second attempt, my first was with watercolors which made the ink run.  The card is made with Lemon Tart cardstock.

Papertrey Ink Tag Download Challenge 2

Project number 2. The tag is by Heather Nichols on a mat of Vintage Cream and the card is made with Spring Moss.

Papertrey Ink Tag Download Challenge 1

The first project features the tag by Tiffany Pastor. It's a very simple one, just the tag on an A2 card made with Papertrey Ink Spring Moss cardstock. The tag is colored with Sakura Glaze Gel Pens.

Sunday, February 6, 2011

Shopping Time

Another layout for my daughter. The shopping carts are from the My World cartridge and sprayed with Tattered Angels Glimmermist Artic Blue. The diamond pattern paper (from DCWV Botanicals) reminded me of the floors in older grocery stores. I really liked the contrast between my handwriting and the clean lines of the font and grocery carts. The font is cut with the Street Sign Solutions cartridge. The shopping carts are on the front of a pocket so I can add stories as they come to mind.

I stamped the tags with a background stamp from Papertrey Ink's Beyond Basics: Retro and their Chamomile Tea ink. It broke up the solid blue and provided journaling lines. I also used it to ink the edges of the tags.

Saturday, February 5, 2011

Mojo Detection


This is one of my favorite projects from last year and my entry in the Ultimate Card Kit drawing. This layout started out as a some reminders to myself about finding creativity, writing down ideas on the Library Cards. The Eiffel Tower and pen were stamped at O'Hare Airport after the CHA Supershow last July. 

The following Papertrey Ink 2010 products were used: Library Card Mini stamp, Woodgrain Impression Plate, "b" from the "best" stamp in Four of a Kind stamp set, All Booked Up (sentiment and tag image). I hinged all the library cards that I had written notes on the back. The snowflakes on the top middle card are punched from a PTI stamp set label.

Wednesday, February 2, 2011

WOYWW 87, some redos and don'ts

I'm shuffling some things on my desk and took some pictures as I went :D. The first don't, don't use Chalkboard Paint on nonstick work space... it sticks and is the dickens to get off. 

I adore the itop snap series, but the snap daddies are difficult to find and shipping costs push them into true luxury items. On a hunch I scouted these out at my local Joann's and (although you can only see the top of it, they fit. So if I buy them on sale or with a coupon I have options for snappy happiness for less money :D. 

Under the snap package is one of my little experiments with photographs. The punch that did not want to work at all with the cardstock last week, worked wonderfully with photopaper. It was also good for stamping and using my small collection of copic markers. I've never used the Glossy Paper, so I have no basis for comparing photograph paper to it.


My favorite Marshmallow Glimmermist clogged in the middle of a project with a deadline, what's a crafter to do? Mini mister to the rescue (it really needs a little super-hero cape). I just poured some of the glimmer mist into the mini mister and spritzed away.

In general I was really happy with the snowman I made from homemade boxes, except the top lid was creeping over his eyes, so I cut it shorter with a pair of scissors. I also hotglued some sticks for arms which will have mittens on them. I'm thinking I'll also add a little stickles to the scarf and the snowflakes.

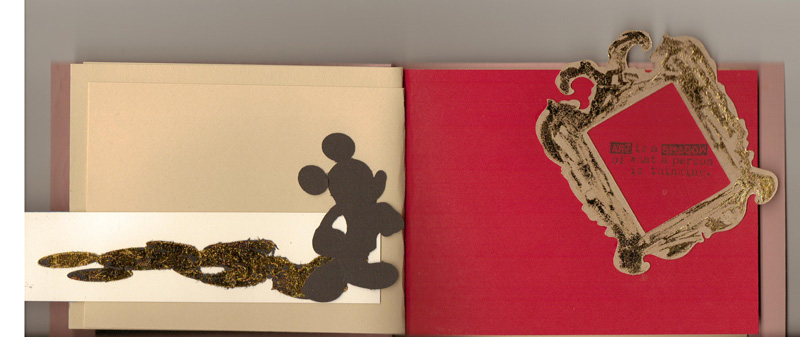
My second redo is a scrapbook layout I just wasn't happy with, so it had a major facelift. I added stamping to the background (a compass rose from a stamp set I had close to hand, I will try to look up the brand later).  I added a pocket for extra journaling. I just used those tags to illustrate the pocket. I think I'm going to use a larger tag with a close up of different aspects of the photograph, like the sister on the right looking like she's plotting to breakout, the sister on the left holding her hat for dear life and me (in the middle) looking like popeye. I made the layout for a challenge and it had to have butterflies on it.  There are four sisters in our family but the youngest wasn't born yet so I put the little butterfly without any holes as a representation of her.

The butterflies didn't cut out completely, but I decided to use that as part of the design taking out some of the cutouts.

I've been sooooooooooo good about not buying paper, but I caved when I saw this stack and it was 50% off. Some of the images are "iced".


Thanks for having a gander! If you'd like to see more work desks or better yet join in the fun hop over to Julia's Stamping Ground.