I'm so excited to be a guest artist for the
Club Scrap Blog Hop. I was sent a
50s Kitchen Lite kit,
Art Nouveau stamp set, flattened bottle caps and the
Cupcake stencil. Seriously so much fun in one pizza box! I made a double layout, four cards, a mini book and an earring holder and there is still so much left for future crafting.
A "Recipe for Happiness" card stamped with the 50s Kitchen Art Nouveau stamp set. The mixing bowls are stamped repeatedly on the bottom half in yellow. The recipe is stamped in blue.
For the layouts I used the two sheets of black cardstock, red and turquoise to mat photographs and one sheet of the white patterned cardstock. The border strips are made from one of the borders from the tan cutapart sheet which was cut in half.
"Chef Mickey's" is cut with Cricut Street Signs Solutions cartridge. The patterned cardstock is 12" x 5".
The arrow is hand cut with a pair of scissors and then doodled on the edge. The journal card is from the white cutapart sheet.The white patterned cardstock on this page is 12" x 6".
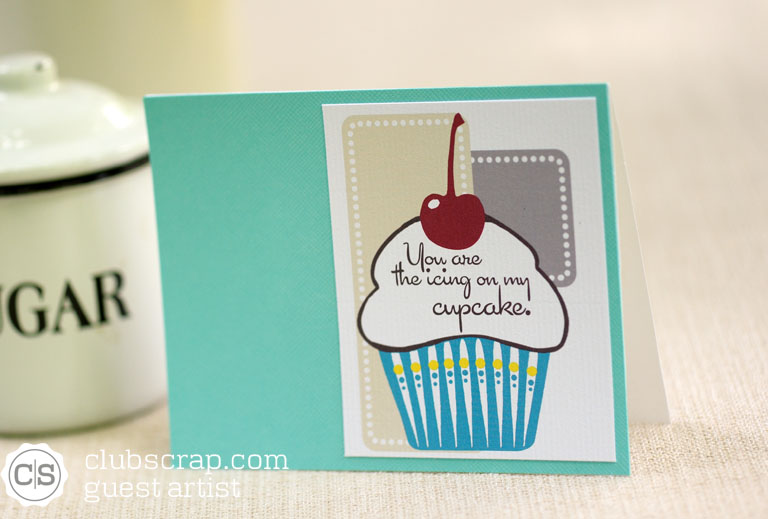
A trio of cupcake cards, made three ways.
The first card is made with turquoise cardstock, the sentiment is from the tan cutapart sheet and the cupcake is from the white cutapart sheet. Inked edges and ribbon tie the two pieces together.
I used one of the white mats and traced the cupcake stencil with a pencil. I drew over the lines with a marker and erased the pencil lines. It's an easy peasy way to get a hand-drawn look. The key is to keep the marker moving without hesitation (YOLO lol). I colored the cherry and cupcake wrapper with Festive Berry and Squeezed Lemonade Distress Markers. The sentiment is from Club Scrap's National Parks kit. The card front is made with the turquoise cardstock and then adhered to an A2 card base.
Another card front made from the turquoise cardstock with the large cupcake from the white cutapart sheet attached to an A2 card base.
The kit has an embellishment storage container that is great for a collection of food earrings. I put Scor-Tape across both sides of the front lip of the container and covered it with a 1" strip of the white patterned cardstock. I used the Tim Holtz Tiny Attacher to attach a piece of the ribbon. The flattened bottle cap is attached with a couple of strips of Scor-Tape on the inside of the cap and a large 3D glue dot.
The final project is a mini book made with the mini book included in the kit. One of the best things about this album is the ring binding. I'm sending
this off with a college student with a few pages filled out and a few
blank pages. Then as the year goes on, I'll send a few more decorated pages with each card I send which can be easily added to the book.
The covers are made with the tan print cardstock, red and
turquoise cardstock, and ribbon. The "good stuff" on the front cover comes from the white
cutapart sheet with a line doodled around the edges.
The cupcake is made by tracing the stencil with a fine line black marker. The cherry is colored with a Zig Clean Real Brush Marker which is also used to doodle a frame for the page.
These pages were made by stamping the background and adding cutaparts with doodled frames.
Some of the pages are just handwritten. The cherries are stamped using markers.The sentiment is from the National Parks kit.
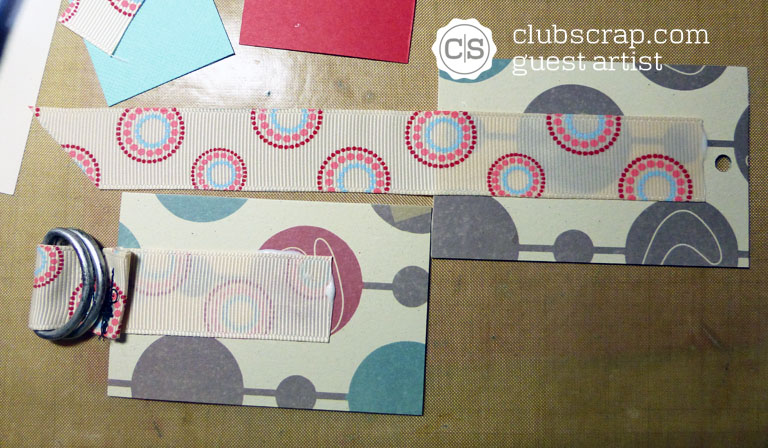
The ribbons are glued to the covers with Club Scrap Bookbinding glue for extra hold. The front cover ribbon is glued down with the tail going off the bottom with the ribbon right side up (shown on the right side of the picture).
A pair of 1" D-rings work with the ribbon for the closure. The only ones I could find were a dark pewter, so I used some Silver Pigment
Alcohol Ink to lighten them up. The closure works no matter how many pages are in the book.
The D-rings are enclosed with a sewn loop and only 1 inch of the ribbon
(the end without the rings) is glued right side down so the rings are
over the top of the cover. Then the mats are glued down over first part of the ribbon that is glued. Then the loose part of the ribbon
can be glued over the mats. I added a ring of ribbon above the D-Rings to
give it a more finished look.
The next stop on the Blog Hop is the back to
Club Scrap!