Showing posts with label Vellum. Show all posts

Wednesday, May 2, 2018

Cantankerous When I Want to be Finale

I've been working on this page a while (2015), but I THINK it's done. The journaling is finished! I love altering photographs, but never the originals. I scan the originals and then print out a new one. I also love twisting the expectation with a contrasting first glance and the actual subject matter.

I added a die cut indicating the journaling is pulled out using a little arrow from Papertrey Ink's Movers & Shakers Sentiments set. I die cut a scrap of glossy paper and stamped the background with Papertrey Ink's Monthly Moments: Tabbed set.

I might add a couple more F Bombs from Kelly Purkey's F Bomb set.

Paper: Anna Griffin, 12x12 vellum, Papertrey Ink Sweet Blush cardstock, Vintage Glassine (for postage stamp collecting).

Stamps: Papertrey Ink Honey Bees, Monthly Moments: Tabbed, Movers & Shakers Sentiments, Simple Alphabets; Kelly Purkey F Bomb

Cricut: Cricut Explore doesn't show which images were used. No idea about the Vellum, letters, speech bubble, and the beetle. The toads are from Spells & Potions.

Miscellaneous: Stickles, Handsput Silk Embroidery Thread (used to stitch translucent pieces in place), Deckle edged scissors (for Journal Pocket), White Opaque Embossing Powder, Glossy Accents


There is something so satisfying about making embellishments : D. This little toad is one of my all time favorites.

Thursday, August 24, 2017

Papertrey Ink Vellum Birthday Card

I love making clear and translucent cards. Papertrey Ink's Vellum is easily sturdy enough to make a card with. In this case I used the large Jellyfish and go with the flow sentiment from Altenew's Painted Jellyfish stamp set. The happy birthday sentiment is from Club Scrap's Gimme A Ring kit. The largest jelly fish layer is stamped with Papertrey Ink's Fresh Snow. I heat set it and waited a while to move on to the next layers which included Sap Green Archival Ink and Wendy Vecchi's Cornflower Blue.

The mat effect is from a piece of  folded patterned paper (enhanced with Faded Jeans Distress Oxide).

The folded patterned paper lifts up to reveal the birthday sentiment : D.

Thursday, October 13, 2016

A Gender Neutral Card : )

A gatefold card made for Online Card Classes Wild Card. The card base is Papertrey Ink's Ocean Tides, stamped with the foliage stamp from Friendship Jar: Flowers set with Fine Linen ink. The flowers are cut from one of the small dies in the Friendship Jar: Flowers set out of patterned vellum. The hearts are Limitless Layers: Heart Stitches cut from Classic Kraft and the plane is Tim Holtz' Mini Airplane covered with a technique from Creative Chemistry 103 (also on Online Card Classes).

 The gatefold opened. Simon Says Global Exploration, so it's there as well. 

Monday, October 10, 2016

Poe with Gold and Vellum

A card made for Papertrey Ink's Make It Monday #263: Background Building with Frames.  I started with Ocean Tides cardstock and added the frame die cut from Tag Sale #10 cut from a gold foil adhesive. The vellum is cut with Friendship Jars: Flowers (2 times) and is adhered to the card under the focal point with Ranger Matte Multi Medium. I love how the light reflecting off the frames catches in the vellum. The focal point is the Poe stamp from Wendy Vecchi's Metro Art stamp set (fussy cut, Tim Holtz collage crazing medium with  a little Distress Crayon worked into the crazing). I had made this a few months ago and it was just waiting on my desk for the perfect project : D.

Simon Says Halloween Inspiration, and since Poe always reminds me of Halloween, I'm entering it there as well : D.

Wednesday, July 27, 2016

Papertrey Ink's Stamp-a-faire 2016

The day started off with a color recipe challenge. I used SAF 2014 1940's mini kit with the Monet recipe. I love the New Leaf, inked again with Pinefeather around the edges.

Then we hustled off to Night Skies. Apparently the secret to night skies are some pale colors. And instead of painting a ground scene I inked the edges with more Enchanted Evening. The Sparkle is some light blue shimmer cardstock from Club Scrap. A bit of handspun linen for the thread nest, some silver star sequins, pale pink sequins, and Stickles (diamond, icicle and lavender). The sparkle is cut with the Sparkle die (from the Sparkle & Shine word dies) made with two layers glued together. The sentiment is from the Sparkle & Shine stamp set.

Gilded in Gold was about gilding, but I didn't have Liquid Leaf, so I drew inspiration from the Klimt video, especially his Tree of Life painting. The tree is from Through the Trees stamped with Versaark and heat embossed with Ranger Fine Detail Gold. The little bird is from the same stamp, stamped in Onyx Black Versafine. The print is from Woodblock Prints stamped with Chalk Box gold pigment ink (just have to remember to heat set it lol).

This was a totally different sort of card based on impressionism and Melissa's technique. The stamp sets for the flowers are Pretty Peonies, Vintage Linens, and Make It Market kit: Nostalgic Notions. The leaves are from Cutting Garden and inked with Spring Moss, spritzed and then stamped and fussy cut. Background Basics: Newsprint was stamped across the Friendship Jar and Background Basics: Gingham was stamped across the bottom. The vellum tag is cut with Fillable Frames #9 and stamped with Merci from Think Big Favorites #3. The scalloped border is from Be Happy set.  Melissa's flower technique is simply brilliant : D. I stamped the jar with Aqua Mist and then painted over it with Aqua Mist and Mint Julep. I need to remember to expand my "outline" stamp color palette.  I've started just gluing down the middle of the flowers with a little bit of Ranger's Matte Multi Medium.

I really loved how this card turned out, inspired by Lizzie Jones' take on a painting by Berthe Morisot. It's difficult to see in the picture, but there is a bit of subtle dry brushing. I discovered a new paint recipe. Pour a small bit (dime sized) of regular acrylic paint on the craft sheet over a smudge from an inkpad (ths was white paint over Stormy Sea) and the spritz the dickens out of it until it is very very watery. Then I distressed the edges with Iced Spruce and Bundled Sage. The sentiment is from Embroidered Blooms stamped with one of Wendy Vecchi's Archival Inks. The flowers are stamped with Yellow Tart, Pale Peony, Berry Sorbet and Pure Poppy (totally copied Lizzie's ink choices). Again the flowers are only attached in the middle, the larger one with Ranger's Matte Multi Medium and the smaller ones with a piece of foam tape.

The challenge for this card was learning different ways to make drips and splatters (on purpose lol). I used tinted white acrylic paint (this time with Forest Moss Distress Ink), Royal Velvet and Ocean Tides. I loved the whole background so much, I decided not to use a tag and just stamped the sentiment (the happy from Be Happy and the Everything from Everyday Happiness). The card front is Stamper's Select White and the base is Stormy Sea.

This card was made using pointillism. Even though the deadline was drawing near, it was nice to have a bit of reflective time and listen to the latest Paperclipping Round Table while I stamped (Sweet Blush, Pale Peony, and Berry Sorbet) and then fussy cut. The techniques are not so absorbing that I forget to listen, but just the right amount of doing something to not drift off and think about other things (I actually was diagnosed with ADHD at the age of 50, but sadly the medications are contraindicated with other conditions I have). The flower is from Year of Flowers: Carnation, the sentiment is from Garden Variety, the card base is Stormy Sea, the string is Rustic Twine thorugh the largest String Frames die, and the buttons are from a bag of Sweet Blush Buttons. Flat little glue dots keep the buttons in place.

It was really late at this point, so by the time I realized my mistake with the watercoloring challenge, it was too late to start over. The problem was I started with Stamper's Select cardstock instead of Watercolor Paper. (I don't know the face palm emoticon lol). But it still turned out nicely, just not as watery as I had hoped. I used one of my all time favorite stamp sets, Willow, and the backgrounds are both sizes of Background Basics: Gingham. The large is stamped over the willow tree die cuts with Ocean Tides, and the bottom is stamped with Spring Moss. The sentiment is from Think Big Favorites #3 stamped with Pinefeather.

The color blocking is all done on one layer! Wilted Violet soup can with a Picked Raspberry background. Abandoned Coral soup can with a Twisted Citron background. Salty Ocean soup can with a Cracked Pistachio background. Peacock Feathers soup can with a Squeezed Lemonade background. The stamp is from Comfort Food. I'm so glad I was finally able to get this set.


Monday, April 18, 2016

Papertrey Ink April 2016 Create Along With Us Challenge

I finally tackled the Movers & Shakers: Sliders die, and once I actually had them in my hands (after watching Nichole's video), it was Easy Peasy.  Stamping the card front and THEN diecutting the top part of the slider works much better than cutting and trying to stamp (just saying lol). I used Spring Rain cardstock for the front stamped with Rainy Day Sentiments with Enchanted Evening for the large drops and Aqua Mist for the smaller. The cloud and Sun are only attached in the middle for extra dimension.

When the ribbon is pulled it pops up the top of the focal point and exposes the slider which is stamped with the solid block from Building Blocks with "We'll be friends until we're old and senile. Then we'll be new friends." written on it.

The focal point base is Stamper's Select White and the Scene It: Skyscapes (cloud and sun) are cut out of  Fresh Snow Linen cardstock. The clouds are painted with Stormy Sky Distress ink and the Sun is painted with Bright Buttercup and Orange Zest. I scored it right at the point that the sun meets the horizon and attached it to the slider at the bottom fold. I stamped the ribbon pull with a pull here sentiment from Movers & Shakers: Sentiments set and is attached to the slider tab with two tiny attachers colored with Ranger Gold Pigment Alcohol Ink. The sentiment is stamped on vellum Fillable Frames #5 stamped with Stazon. It is attached with a line of Tombow Multi behind the "behind".

For this month's Create Along With Us Challenge, I  was inspired by this card made by Heather Nichols cards for the Papertrey Ink April 2016 release

The Mixed Media Monthly Challenge is Dimension, and Simon Says Let's Do the Polka, so I'm including it there as well.

Sunday, March 20, 2016

Spring is in the Air

The base is Papertrey Ink's Stormy Sea stamped with the ticket from Tim Holtz' The Journey set with Stormy Sea ink and Wendy Vecchi's Vintage Lace stamp with Picket Fence Distress Ink (also used to distress the top of the card. The sentiment is from Tulip Time. The Doily Details die cut is stamped with Altenew's Vintage Roses (stamped in Lovely Lady, Autumn Rose, and Scarlet Jewel inks). There are also two fussy cut roses attached with layers of foam tape over Papertrey Ink's Fresh Snow Velvet Ribbon (I might be addicted to this). Crystal sequins for the finishing touch.

Inside, I stamped the set of three from Tulip Time and attached a Spiral Notebook Page die cut (from Patterned Vellum) stamped with sentiments from Inside & Out: Well Wishes attached with my Tim Holtz Tiny Attacher with the staples colored gold with Ranger's Gold Alcohol Ink.

Friday, November 6, 2015

Shine, It's Your Day!

Shine. It's your day! Using a petite LED from Papertrey Ink, the card actually lights up : ).

Here it is with the light turned off. The balloons are from Make It Market kit: Party Pop Up stamped in Limeade Ice, Aqua Mist, Pure Poppy, Blueberry ky and Summer Sunrise inks.  The streamers are from the Hooray stamp set stamped with Pure Poppy. The background of the manilla mat is Fair Isle Borders stamped with Fine Linen. The kraft background is the Make It Market kit: Nostalgic Notions stamped with Fine Linen.

The lamp and sentiment are from Lighten Up. The lamp base is stamped with Dark Chocolate and distressed with Vintage Touch Tea Dye (Chai). The lampshade is cut from Sheer Basics vellum Patterned Paper (the polka dots).  The sofa is plaid patterned paper diecut and stamped with On My Couch and edged with Vintage Touch Tea Dye (Chamomile). A strip of Tombow Multi Glue set aside to dry is behind the ink on both sides.

The die for the light to shine through is the pointy ribbon from Make It Market kit: All Through the House. I made a little pocket for the light with an arrow from Movers & Shakers Sentiments to point out the button. I might use a hole punch on the edge so the button is a little more noticeable.

Foam tape is used to give a little dimension to the sofa and some of the balloons. If I were to to mail the card, I'd put it in a padded envelope to keep the light from creasing the card, but it's not very thick.

Saturday, August 29, 2015

SAF 2015 Bridal Challenge

Here's my take on Papertrey Ink's Stamp-a-faire 2015 Bridal Challenge.

stamp and die sets: Everyday Happiness, Rosie Posie, Fabulous Frames
paper: Stamper's Select White, White Shimmer, Sheer Basics Vellum Patterned Paper (tiny polka dots and Chevron)
embossing powder: Sparkle n' Shine Gold Detail, Sparkle n' Shine White Detail Opaque
adhesives: Stampin' Up foam pop ups, Ranger Matte Multi Medium (sequins), mini glue dots (behind the embossed areas of the flower).
embellishments: white flower sequins from Lovely Laurels mini kit, Darice 8mm Crystal sequins, PTI silk ribbon on a spool

Monday, July 27, 2015

Banner Day

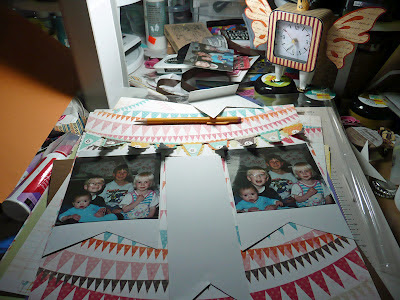
Sometimes a layout will get put aside for a variety of reasons, but sometimes that works out to my advantage and I go in a different direction that I like even better. as in this case. I dropped the idea of  banner mats, used more pattern papers and some Papertrey Ink vellum (distressed with a scissor on the right side).  And fussy cut some arrows from Papertrey Ink's Get to the Point set. Glossy Accents dots over the letter stickers.

Until recently this was as far as I had gotten since I placed all the pieces together on August 25, 2012 to mull it over while I worked on something else.

Sunday, July 19, 2015

Hoping Your Day is Quite Nice

updated 7/23. There was something off about the original the more I looked at it, the more it disturbed me. I started to rework the card and tore off the top of the tissue tape. Suddenly I loved it. Less than 3/8's of an inch makes such a difference?

Papertrey Ink is having a new challenge Create Along with Us, where we create a card inspired by one of the Design Team's cards. That's the first challenge, how to pick one? I picked Melissa Phillips tea cup of flowers.

Instead of a teacup, I used the cupcake base from Make It Market kit: Party Pops stamped with Classic Kraft and then muted with white pigment ink. The flowers are from Rosie Posie made with the polka dot vellum and stamped with white pigment ink. The back ground is stamped with Background Basics: Gingham and Spring Rain ink and stamped again over a scrap of striped patterned paper. A piece of seam binding for a little more horizontal emphasis. Another piece of scrap is cut with Tim Holtz' On the Edge: Scallops die and a strip of Tim Holtz Tissue Tape. A little distressing with Fine Linen ink and Antique Linen Distress Ink. The sentiment is from Make It Market kit: Nostalgic Notions. A couple of sequins finish it off.

Simon Says Anything Goes

Thursday, June 25, 2015

Papertrey Ink June 2015 Blog Hop

Papertrey Ink's June 2015 Blog Hop! The card base is an A2 top folded made of Stamper's Select White. The stripes are Weathered Wood and a touch of Black Soot Distress Inks smooshed on the craft sheet, spritzed with water and painted with a wide brush (then dried with a heat gun). The focal point is from Bold Bouquet (I finally got the dies), Sheer Basics Vellum Patterned Paper stamped with pigment ink. The dots are made with a Viva Decor Hematite pen but the sparkly bits didn't photograph well.

Simon Says Anything Goes : )

Wednesday, June 10, 2015

WOYWW 314

Another day, another card front lol. This one is on Tim Holtz watercolor paper, stamped with one of the flower detail stamps from Altenew's Painted Flowers with Versafine ink, painted with Kuretake Gansai Tambi watercolors. The vellum mat is cut with Papertrey Ink's Mat Stack 1 and adhered with Scotch Vellum Tape (put the tape on the paper and then attach the vellum on top... seriously does not show through), and a thank you from Taylored Expressions inked with Versamark and heat embossed with Ranger's Fine Detail Gold Embossing Powder. I believe this is a personal record for number of brands used in a single card lol.

At the back is a new die (to me) from Papertrey Ink which cuts a coin purse complete with stitch holes that can be made 3 ways two full size pieces stitched together or fold it  horizontally or vertically. I'm itching to get started with it!

To see more crafty spaces, head over to Julia's Stamping Ground and have a gander : D.

Wednesday, March 11, 2015

When I grow up, I will be . . .

When I was a child, I was frequently stuffed into tight dresses that didn't allow me to lift my arms. I was frequently told I wasn't allowed to be mad. So now I am grown I am as cantankerous as #$@& when I want to be : D.

The base paper is Anna Griffin the mat is vellum, the "#$@&" and "cantankerous" are  glassine. And there is a lot of stitching with handspun silk embroidery thread. I used the Cricut Explore but there is no way to identify cuts after they are put into a project... so.

Simon Says special lady/girly which is perfect : ).

Saturday, February 21, 2015

$12 Meal Scrapbooked and the Joy of It : )

Very belatedly, I did a layout challenge using this sketch. I had so much fun making this layout.

The why of it is a $12 meal at the airport. (The reasons for it, what it was, comparisons, etc.).

The how of it.
The base paper is from a scrapbooking kit called "Destination" by Colorbox I think I bought it over 10 years ago. And there is only ONE sheet of it. And I used it all up lol. And I'm only moderately twitchy over it because it is great "Airport" paper. And I have a lot of Airport scrapping to do which is odd, because I hardly ever fly.

The Title was cut using the Seasonal Postage font with my Cricut Explore (I think it might be a font exclusive to the explore, but I'm not certain). After I cut the letters I covered them with Antique Linen Distress Paint. Then I used Wild Honey and Festive Berries Distress Stains. And finally I used Glossy Accents before I adhered them, and then I filled the cut out portion with more Glossy Accents.

The "mat" is Papertrey Ink Kraft cardstock that was stamped with a foam silverware set I've had for ever stamped with Picket Fence Distress Paint. Then gone over with Wild Honey and Festive Berries Distress Stain then rubbed vigorously with an unscented baby wipe which gave a swede texture to the mat.  I attached it at the top and bottom to make a pocket for more journaling.

The side of the journal tag (made with Papertrey Ink Vintage Cream cardstock) with the Clip Tips die cut (Dark Chocolate cardstock) covered with more Glossy Accents as a substitute for one of the embellishments. The compass rose from Road Trip (stamped with Dark Chocolate ink) and the Cosmo Cricket Tiny Type alphabet stickers are the other substitutes. 

I try to remember to always make a journal pocket. In this case a jumbo sized one.  If I had a nickel for every time I thought I had remembered everything I wanted to say about a page only to remember something else after the last element was glued... I have a lot of nickels lol. (In a pinch I have actually added more of the story to the back of the page).

I moved the lines below the mat on the vellum banners. The plane and arrow stamps are from Clip Tips also.


Friday, February 13, 2015

Heavy Metal Challenge

Papertrey Ink is having a Heavy Metal Challenge to create a project featuring nothing but neutrals and metallics.

The front of the Stamper's Select White cardbase is covered with the gold from the Make It Market kit: Lux Letterpress. White vellum was run through Tim Holtz' Notebook Embossing Folder. I used my Cricut to cut the star charm from the Cricut Doodlecharms cartridge out of the gold adhered to Vintage Cream cardstock. "You're Simply the Best" is cut from the Wild Card cartridge. Tombow Multi Glue was applied to the back of the sentiment and allowed to dry before attaching to the vellum so a little extra dimension could be had.

Saturday, September 20, 2014

Paper Weaving

A tag with paper weaving.  The Papertrey Ink Make It Monday#180: Paper Weaving and Simon Says Tag It.

I wanted to use the border cut and a double layered in my weaving, so the rest of the strips I chose were softer hues cardstock and white vellum. I taped all the ends to a piece of Classic Kraft cardstock and then started to weave. The side to side pieces were all the same cardstock and I didn't have a lot of it so I stitched every thing down.

Since the challenge at Simon Says is Tag, I used my 1/2" side of the Corner Chompers and a standard hole punch and voila a tag.

I was heavily influenced by Melissa Phillips post on layering with vellum for the focal point, using two layers of purple vellum over the Classic Kraft cardstock die cut with Papertrey Ink's Limitless Labels 2 1/4 square die set and inked with Seedless Preserves Distress Ink. The square is edged with Dusty Concord Distress Ink, edged with paper piercing and stamped with a two part stamp from Papertrey Ink's A Little Inspiration stamp set (in Seedless Preserves and Dusty Concord). With a few Mirror Stars from Tim Holtz' Ideology. The bow is Papertrey Ink silk ribbon dyed with Seedless Preserves spritzed with water on my craft mat.

Monday, August 25, 2014

Yes! I used my Paper Crimper


The Papertrey Ink Stamp-a-faire 2014Time after Time challenge was to remake a card made some time ago. The card on the left was made for the July 2011 Papertrey Ink Blog Hop.

And it was the perfect card to remake because I got to use my Paper Crimper for the window sheer! I started by cutting a square in the "wall paper"and stamping a view with a stamp from Club Scrap's Destinations kit on the white cardstock where the "window" would go. Then I used my hand-carved Monster stamp which I heat-embossed with black embossing powder. I put the wall paper on the white cardstock and ran some thin vellum through my paper crimper. I made a valence out of the same paper I used from the wallpaper and some foam dots. I die cut the couch and paper pieced the sofa cushions and pillows (stamped with the flower from Botanical Silhouettes. I order to avoid the gap in the cat that I got the first time, I stamp the cat first on the background, then on the sofa and then lined it up. I even paper pieced the picture this time. (Couch, cat and picture are from the On My Couch set also purchased at the CHA 2010 Super Show.

Saturday, August 23, 2014

Papertrey Ink's Stamp-a-faire 2014: Explore the Regency Era

Explore the Regency Era with Melissa Phillips. Have I mentioned the playlist that accompanies each era? I get to listen whilst I write my posts. If I wasn't so graceful, I'd have my computer in the craftroom, but I'm unwilling to risk it lol. I used the frame die and stamp from the Regency mini kit. I love that blue striped paper. The mat is Vintage Cream and the die is from Papertrey Ink's Make It Market Co.: Luxe Letterpress.  I stamped the mat with the cross-stitched rose in Tea Dye Distress Ink and distressed with Aged Mahogany and Antique Linen.

This kit has also given me ideas for the perfect gifts for someone who loves the Regency Era.

Tuesday, August 5, 2014

Happy Day card


It's rare that I spend two days working on a card, but for this one I did. The Papertrey Ink dies I used to make the border cut from non-border dies are the Strip Stitch die and the butterfly and "happy" from Pretty Peonies. After watching the video carefully, I promptly cut off the wrong side lol. So I had to run it through again with a second A2 mat.

I found some stunning deep brown (with glitter) paper from K&Company Classic K Specialty Paper Pad which I wanted to show through under the Strip Stitch die cut I butted the border cut up against. I also left a lot of the dots in the cut. I distressed the non-image parts of the border and the K&Company paper with the edge of a pair of scissors.

Then I stumbled across a very very old piece of  pearlized vellum paper (easily 15 years old) and cut 2 butterflies, the peony and leaf image and "happy", then stamped them with Versamark and embossed them with Zing Chocolat Opaque embossing powder (except for the leaves which I stamped in black ink and left unembossed. The butterfly on the flower is stamped and embossed whole and then folded in half. I used Scor-Tape to attach the flower and butterflies, I ran the "happy" through my little Xyron.

At first glance, it might appear that the star of the card is the Pretty Peonies stamp set and matching dies, but to my mind the even bigger stars are the Strip Stitch die (and the stamp I made out of fun foam with it) and this fabulous Sprinkle N Sparkle Cosmic Semi-Transparent Pineapple Embossing Powder. It is the tiniest little jar (I bought at the 2010 CHA Supershow), and I still have almost all of it even after embossing all this. I was really pleased with how the foam rubber stamp lined up with the border cut and matched that up with the die cut.

I put everything on an A2 card with about an inch cut off the front so the border images (especially the Strip Stitch die can be seen to best effect : ). All the cardstock used is Papertrey Ink's Stamper's Select White which is heavy enough to stand up to all the additives.

I felt bad that the K&Co paper was so covered up, so I added a small strip of it on the inside.

Make It Monday #175: Creative Card Borders Using Non-Border Dies and Simon Says Anything Goes (note to self, second entry)