Wednesday, May 11, 2011

WOYWW - 101

This is what happens when I try to clean up, but I have to keep crafting in the mean time lol. A lot of broken eggs, but hopefully it will be a nice omelet when I'm done. Not much that I can show you this week, but I do know where my glasses are :D.

If you are keen on seeing lots of other workdesks this fine Wednesday, hop over to the Stamping Ground and have a gander. Better yet, snap a picture and join in the fun!

Wednesday, May 4, 2011

WOYWW 100 - Party Animals Abound

Happy 100 weeks WOYWW, though I haven't been around for all of it, it's been lovely place to hang out. So I'm tossing confettii :D.

It's been a busy busy busy week lol. I'm going to have to sort things out soon. Soon-ish anyways lol.  The card that's lying down just in front of one of the lazy susans is one I've had in my head for a while, and will probably make some more in variation.

Here's the close up :D

And the little stack of cows atop the bins is from my new Imagine (which I won over at Everyday Cricut). I only got it set up last night. It prints AND then cuts them out. It is a big honking machine though lol. Definitely not something you'd want to take on a picnic. I've still got lots and lots and lots to learn, but I did need to have some cows :D. Dare I say, it's absolutely bovine? OK I dared lol.

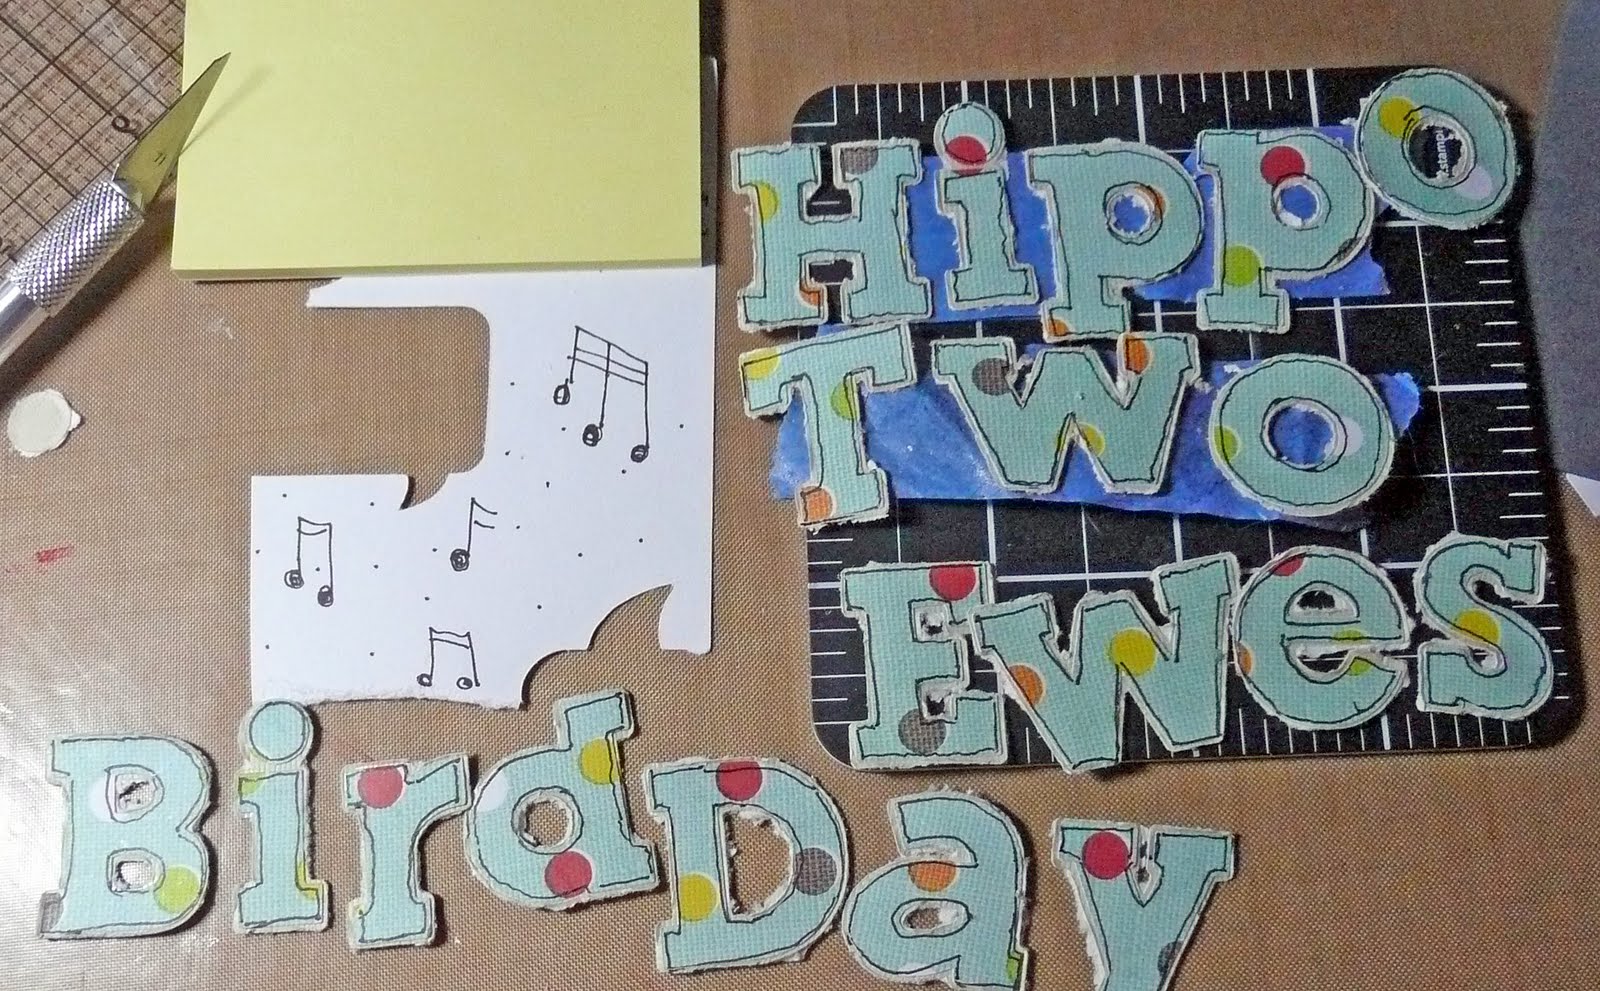
And still following the animal theme, today is my turn to be Guest Designer at The Bug Bytes, so it's a Hippo Bird Day Two Ewes layout.

If you are wondering what other people have on their workdesk this Wednesday, then head over to The Stamping Ground and have a gander, better yet snap a picture and join in the fun. Thanks for looking, and hoping your Wednesday is glorious :D.

Introducing 2011 Miss Ewe

As a spinster (spins fiber into yarn), how could I not be drawn to this stamp set? The scalloped oval is from the Lacey Labels Lite cartridge, the sheepy bits are from Papertrey Ink's My Punny Valentine stamp set, Miss Ewe! is from My Pink Stampers Punnylicious or More Punnylicious (I was too excited when I took them out of the wrappers to keep track). The crown  is made with dots of Patina Distress Stickles. The sash is made with Papertrey Ink silk ribbon.

Hippo Bird Day Two Ewes

It's the first Wednesday of the month which means it's my turn to be a Guest Designer at TheBugBytes :D.

The titles, the hippo, the bird and ewes all come from the Cricut Birthday Bash cartridge.  The circle is from George and Basic Shapes, but any circle will do.  The blue mats are cut 4.25" x 6.25" and the cream is a stand in for a 4" x 6" photograph. The edges of the blue mats are distressed with a pair of open scissors (used like a potato peeler). The pattern papers are from Sassafas Bungle Jungle (lovvvvve this). Everything except the title shadows and the mats were outlined with an ultrafine black pen.

All the title shadows were cut out of some beige textured DCWV, and they were all kiss-cut so it would lessen the time I needed to spend distressing all the edges with a pair of scissors : D. I felt using the same cardstock as the base for all the animals kept the same tone, and I just used Distress Inks to get the different colors.

I glued the letters before I did a little extra distressing and then outlined each one with a fine line black pen. The musical notes were a background I considered making, but decided against it for now (something I might use later though lol). Painters tape was very handy for keeping the letters together to keep the pattern right:  the "o" in hippo is different than the "o" in two.
I covered the hippo with Worn Lipstick Distress Ink. This also accentuated the cut lines that I later highlighted with a fine line pen.

DD thought the hippo needed a tutu, and I thought it was a brilliant idea so I used a paper piercer to punch a waist line for the tutu, cut some tulle about two times wider than the hippo, folded the tulle over at one side and attached with a sparkly purple brad. Then I attached the other side (folding it over the other way so a folded edge was on each side).  Then I put one in the middle and sort of bunched up the remaining fabric and attached with the brad. You might notice that though the Hippo is dancing daintily, the "O" has fallen under the weight.

After the bird was cut, I drew lines as a substitute for layers. If you cut the layers, you can use them as a stencil if you feel more comfortable doing that.

I used the Distress Ink painting technique Tim Holtz (gotta include him in the post right?) demonstrates on his blog. Smudge the ink on a nonstick mat, spritz with Mini-Mister filled with water, use paint brush to apply to cardstock.

Before I distressed the Ewes I put the layer over the base (not glued) and used the layer as a stencil for the ear lines. Then I painted, outlined and distressed the edges of all the pieces before gluing them together.

Tuesday, May 3, 2011

Sweet Challenge

There is a card challenge at Club Ruby Designers twice a month, and the winner gets a goodie bag from Megan Gravener. The challenge this time is to use a cupcake in the design of a card or project, and I knew it was the perfect time to break in my Damask Decor cartridge.

This cut is utilizing the silhouette feature (cut at 4.41" high using Ocean Tides cardstock from Papertrey Ink) with some Anna Griffin paper as the background.  The happy birthday sentiment is from Club Scrap and stamped with Faded Jeans Distress Ink. I also used the Faded Jeans to edge the outline of the card base. To finish it off, I drew a frame freehand with a Fine Line Sharpie.

Saturday, April 30, 2011

Papertrey Ink's Make It Monday Line Frame 101 challenge


This week's Papertrey Ink's  Make It Monday Challenge is to make a Line Frame. Here's my take on it. The circles are 1.75". With one of them stamped with images from the Tags for Spring stamp set with distress inks. I used my favorite Ocean Tides for the card base.

Friday, April 29, 2011

My Name is Earl

A layout dedicated to one of the sweetest cats I've ever known. Sadly he passed on in 2006 at the age of 14, long before I was ready to say goodbye. I just couldn't bring myself to write my name WAS Earl though.

I used some stripey paper and cut out four of the same stripes and then mitered the corners. The title is from American Crafts (foil). I added a little sparkle by covering the sides of all the letters with Viva Decor Hematite Glitter Liner. I used the same paper to make mats for all the photographs and the journaling. I made the large two photo mat into a pocket for extra journaling by adhering it with ATG tape on the bottom and sides only. Earl is cut from the font on the Birthday Bash cartridge. I welded the shadow together on my Gypsy and then just put the letters on top of that.

I made a hand cut heart to replace the dot for the i, and used Scotch Quick Dry to glue the key on. So far so good. Everything comes from the Club Ruby Designers' October kit.